As the leaves turn amber and Halloween approaches, many parents scramble to find the safest way to let their children carve a pumpkin. Recent surveys of backyard events show a surge in “kid‑friendly” carving sessions, yet a handful of safety mishaps keep headlines in local news. This article breaks down practical steps, tool choices, and creative ideas that keep little hands busy while warding off accidents.
Choosing the Right Pumpkin: Size, Shape, and Texture
When a family first steps into a farmer’s market, the selection aisle often feels overwhelming. Orange, sugar, and even “mini‑squash” varieties compete for the eye. The key is to pick a pumpkin that balances firmness and size—too soft and the outline will collapse; too large and a child’s reach will be limited.
- Standard Halloween Orange – 6 to 8 inches across, ideal for beginner patterns.
- Sugar Pumpkin – slightly sweeter scent, good for indoor carving because it dries faster.
- Mini‑Squash – 4 inches or less, perfect for tiny hands but may need a helper for trimming.
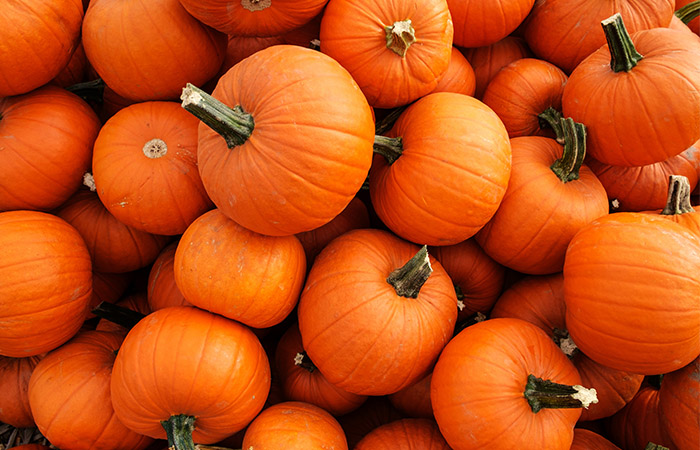
Use the image below to compare visual differences in a real setting.

Tools That Make the Process a Breeze: Kid‑Safe vs Adult‑Grade
Parents often wonder whether to borrow a professional carving knife or invest in a child‑friendly set. The comparison boils down to precision, safety, and ease of clean‑up.
- Child‑Safe Protruding‑Edge Knives – have a rounded tip and a guard to prevent deep cuts.
- Sharp Adult Scissors – great for initial scoring but can be hazardous if the child over‑exerts force.
- Ice‑Cube or Pumpkin‑Scoop Tool – perfect for removing the insides without a knife.
For a hands‑on demonstration, watch how a child removes a chunk of pumpkin with a scoop, reducing the risk of splatter.

Safety First: Setting Up the Carving Station
Where the carving takes place can influence accident rates. Outdoor setups expose children to wind and uneven surfaces, while indoor tables can be slick if not properly prepared.
- Choose a stable surface— a thick board or a dedicated cutting mat keeps the pumpkin centered.
- Provide ample lighting— a small LED lamp or a bright flashlight ensures the pattern is visible, preventing inadvertent deep cuts.
- Keep a first‑aid kit nearby— bandages and a small bottle of antiseptic can calm any minor mishaps.
Creative Designs That Keep Kids Engaged: Templates and Tools
Complex faces often tempt children to use excessive force, increasing the chance of injury. Simple, step‑by‑step templates—like a classic jack‑o‑lantern or a witch silhouette—are safer and more satisfying.
- Template Method – trace the design before cutting, which controls depth and symmetry.
- Hand‑drawn Lines – for older kids who can handle a small knife, a pencil outline provides a custom feel.
- Light‑Up Options – replace the traditional candle with a battery‑powered LED to reduce fire risk.
Aftercarving Care & Display Options
Once the carving is done, preserving the pumpkin’s shape is essential if you plan to display it. Simple tricks help the pumpkin last longer while keeping the family safe.
- Apply a light spray of water before carving to keep the pumpkin from drying too quickly.
- Use a preservative spray made of vinegar and water—apply once every day to slow mold.
- Store on a cool, shaded shelf when not on display; direct sun accelerates decay.
In short, a kid‑friendly pumpkin carving session balances thoughtful selection, the right tools, a secure environment, and a simple design plan. By following these practical steps, families can enjoy a witchy, creative Halloween without compromising safety. This guide offers a clear, comparative approach that turns a potentially risky activity into a memorable family tradition.
Pumpkin Template
:strip_icc()/carved-pumpkin-silly-smiling-face-8b8de000-9dd884da861d4c8291fff53b2b160774.jpg)
Pumpkin Template
23 Amazing Benefits Of Squash For Skin, Hair, And Health
23 Amazing Benefits Of Squash For Skin, Hair, And Health
Pumpkin Isolated Free Stock Photo - Public Domain Pictures
Pumpkin Isolated Free Stock Photo - Public Domain Pictures